|
||||||||||||||||||||||||||||||||||||||||||||||


|
||||||||||||||||||||||||||||||||||||||||||||||||||||


|
|
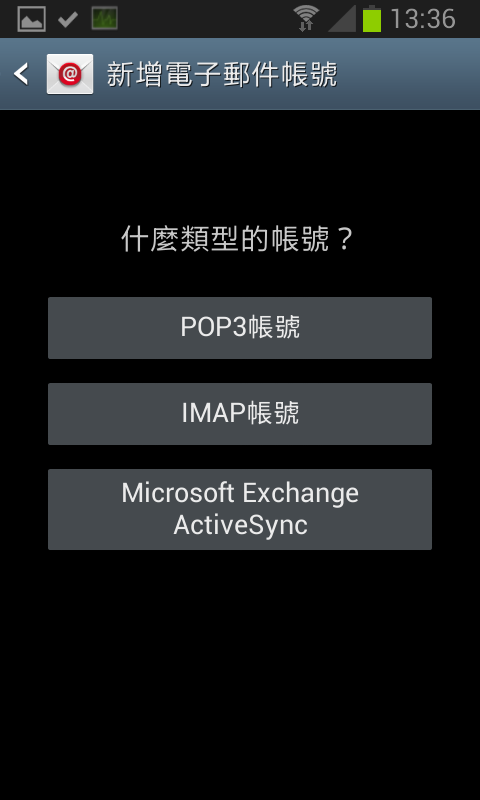
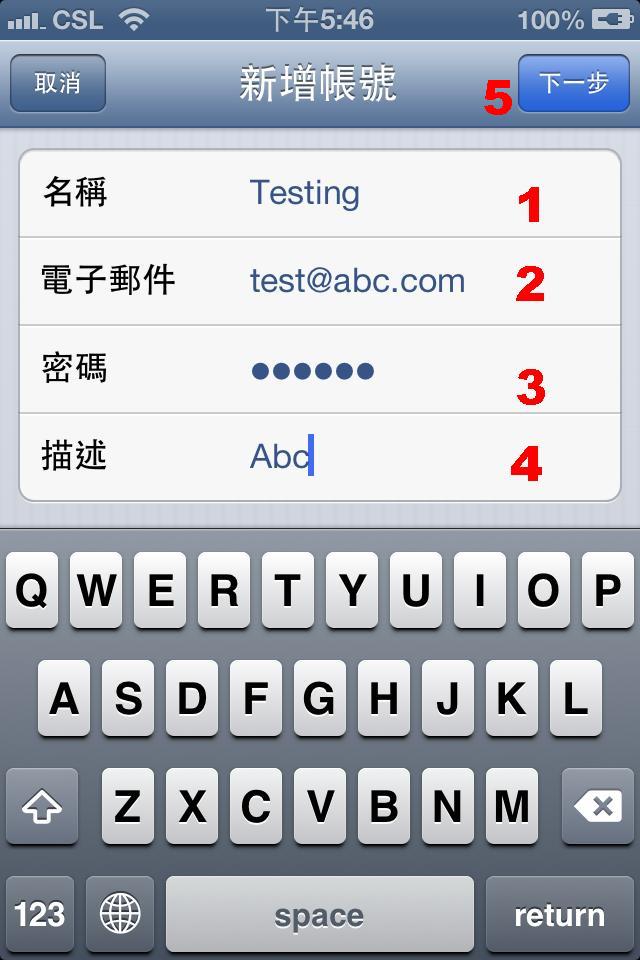
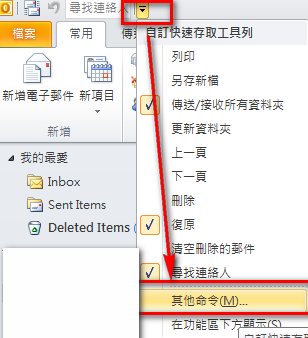
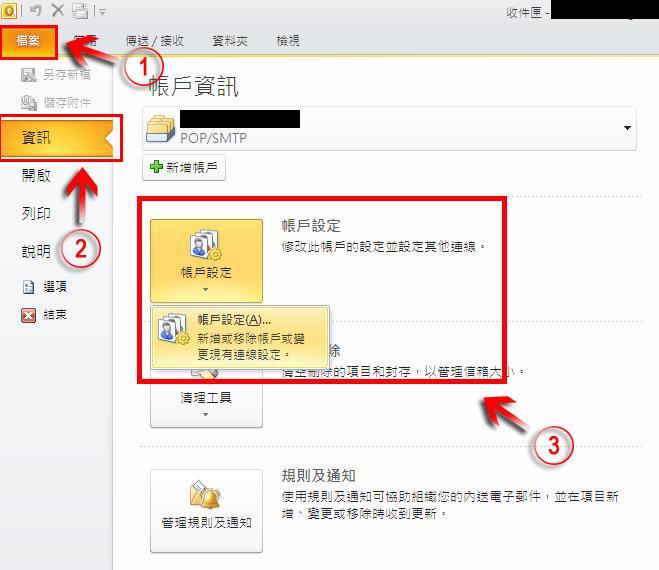
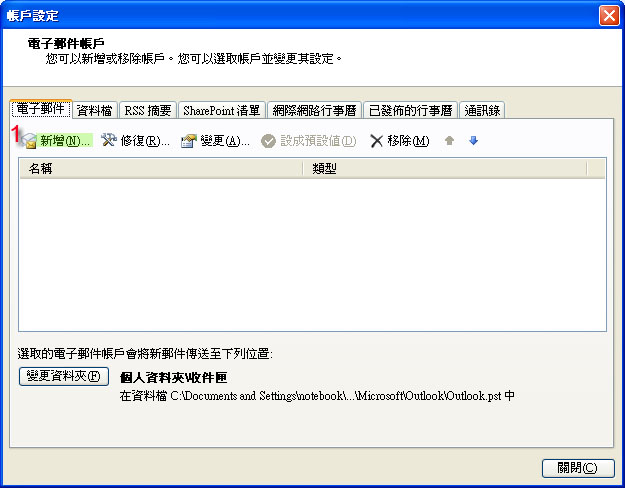
建立電郵帳戶指南
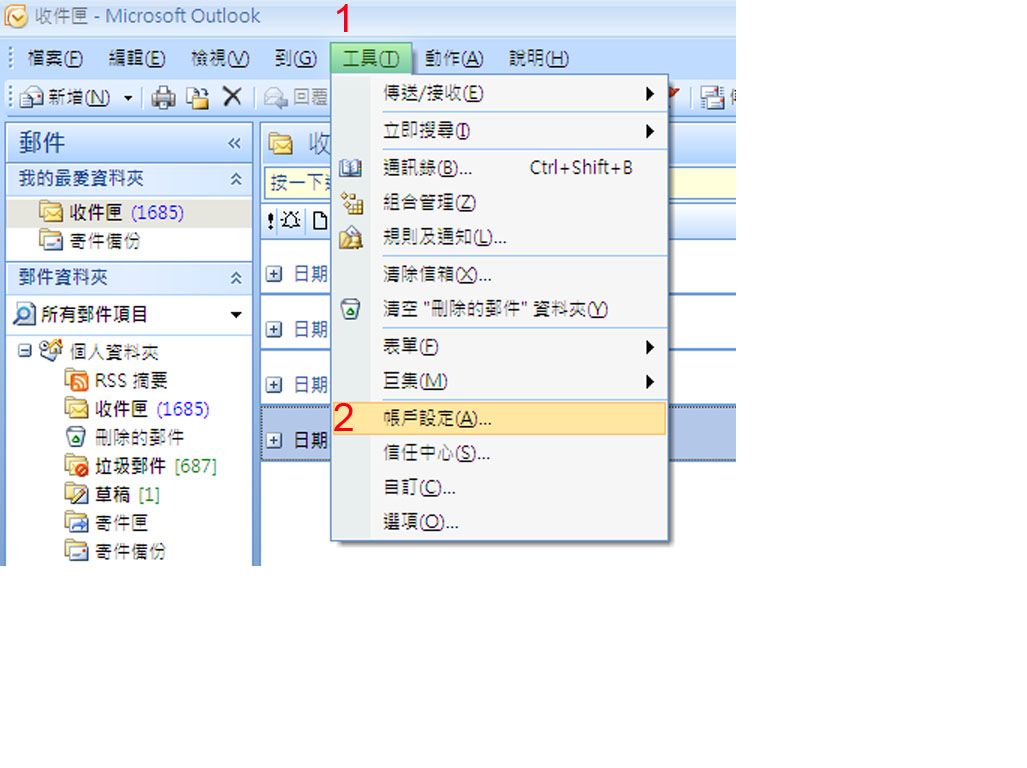
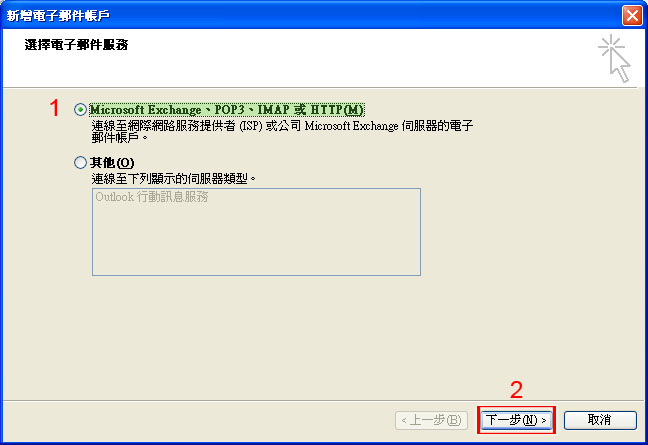
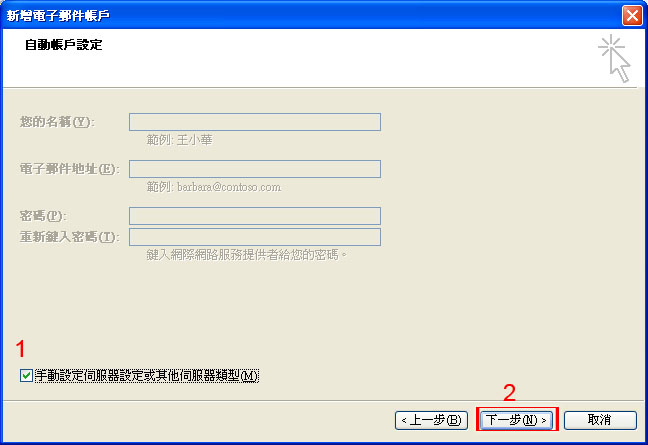
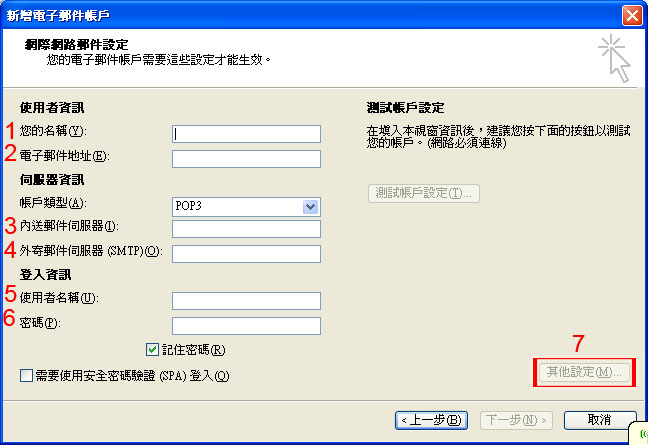
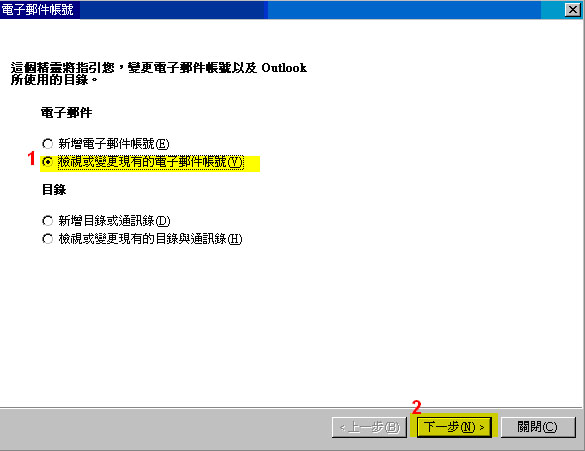
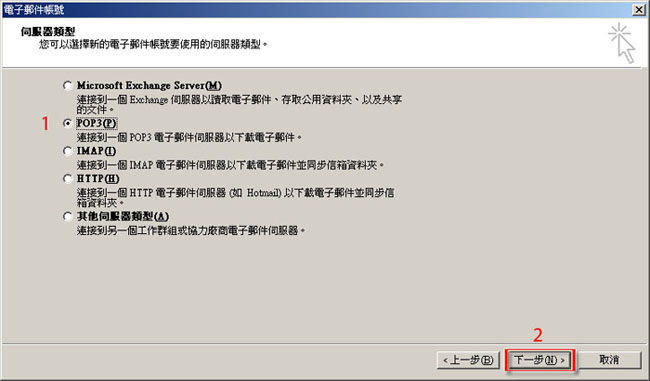
開啟 Microsoft Office Outlook 2010 . Click: (1) “檔案“ (2) “資訊“ (3) “帳戶設定” >> “帳戶設定(A) 新增…” (4) “新增“. (5) “手動設定伺服器設定或其他伺服器…” (6) “下一步”
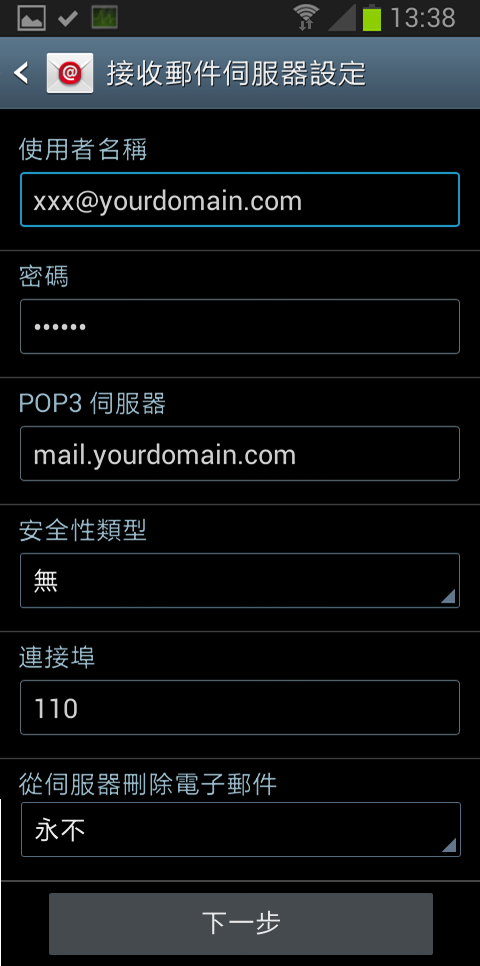
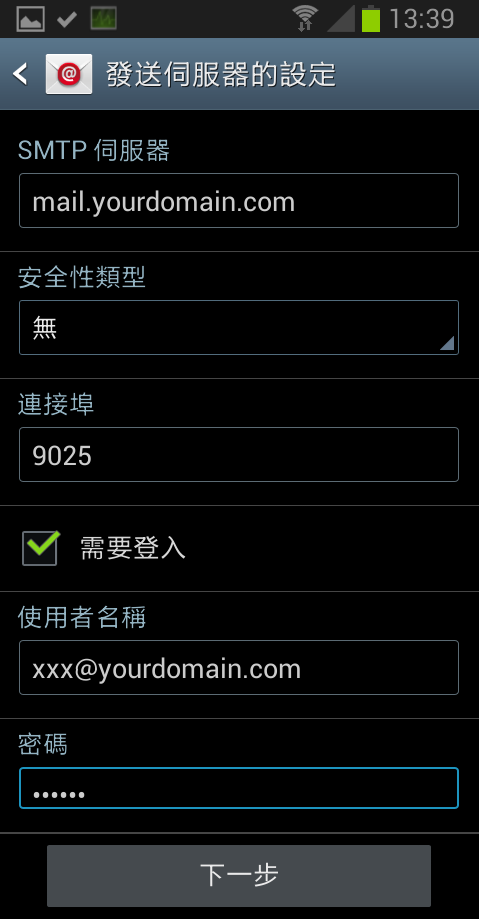
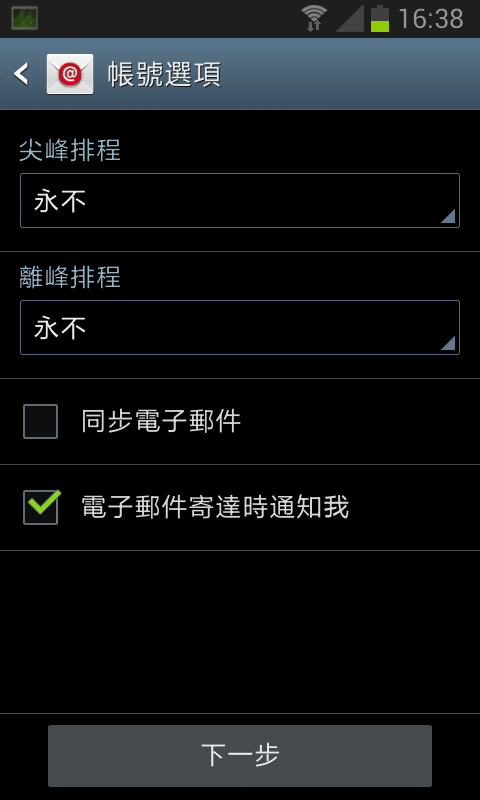
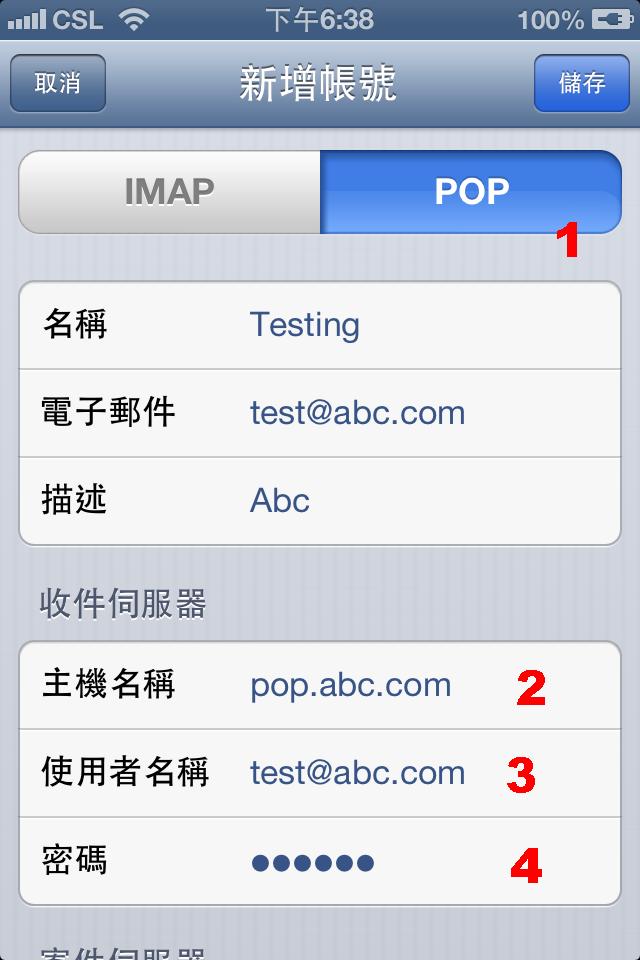
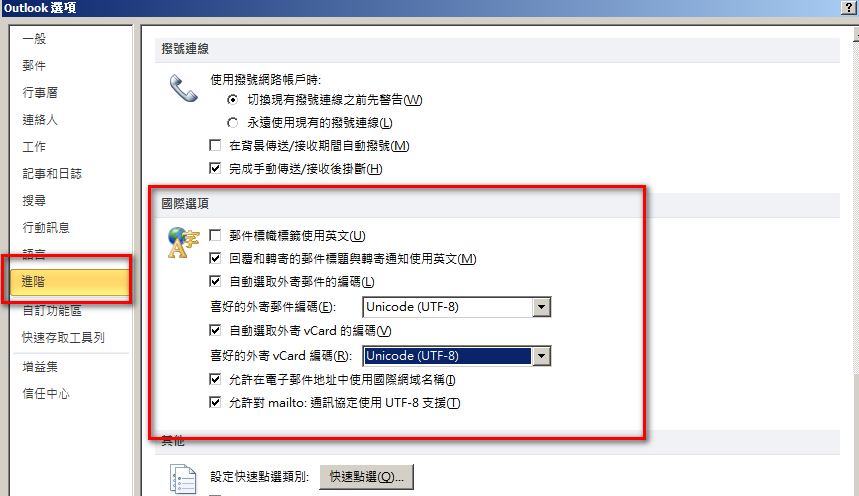
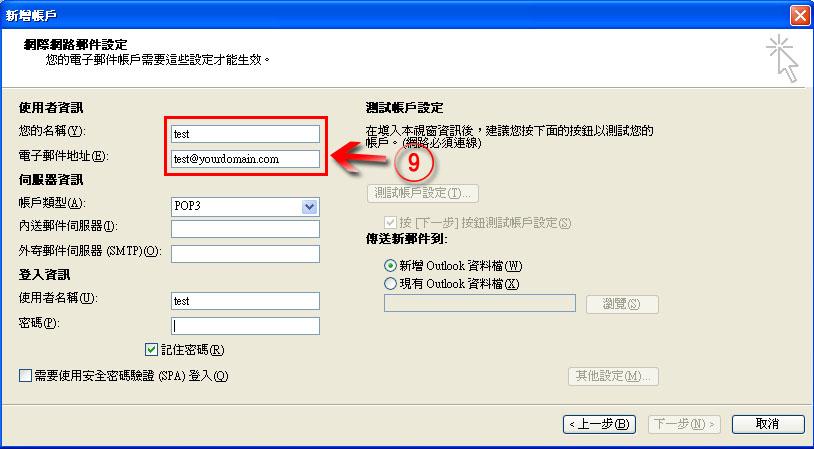
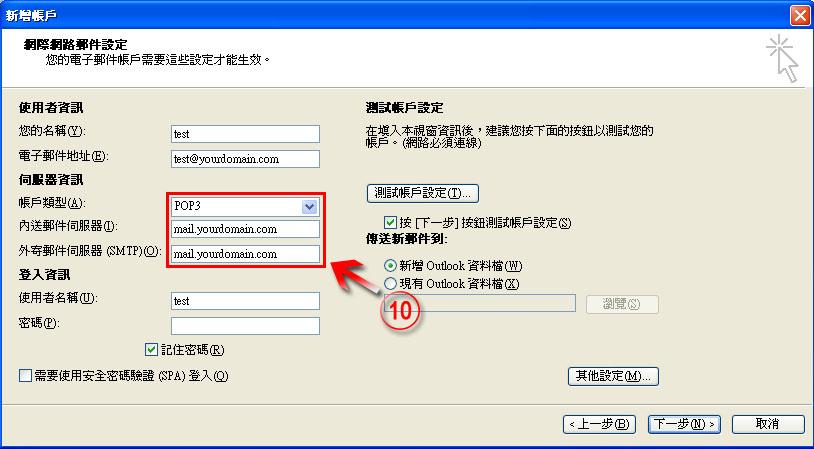
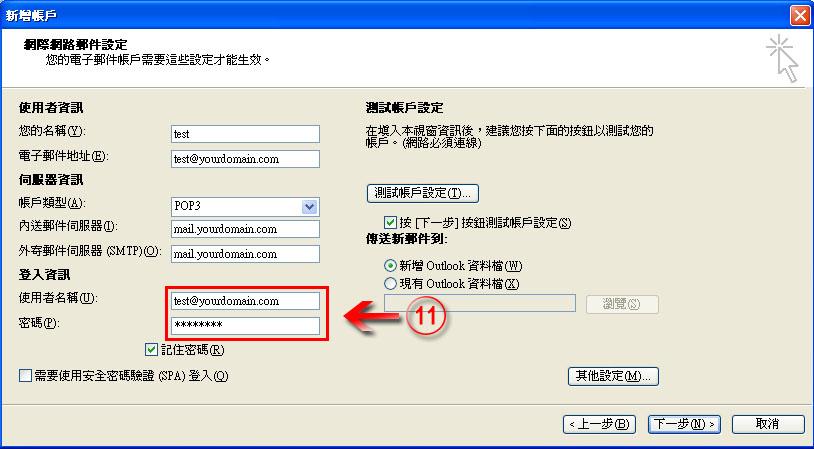
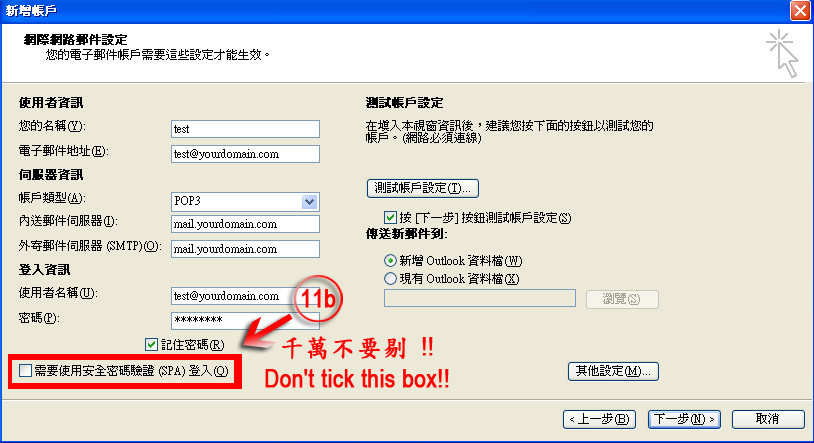
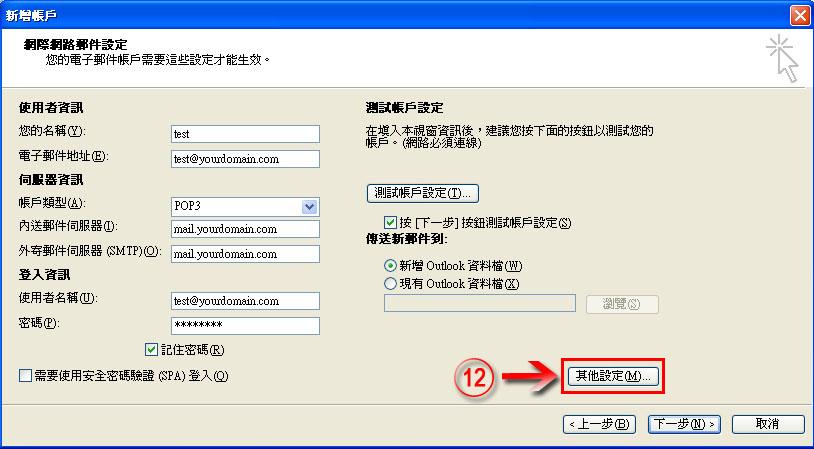
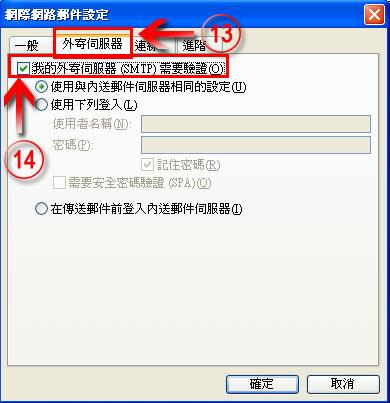
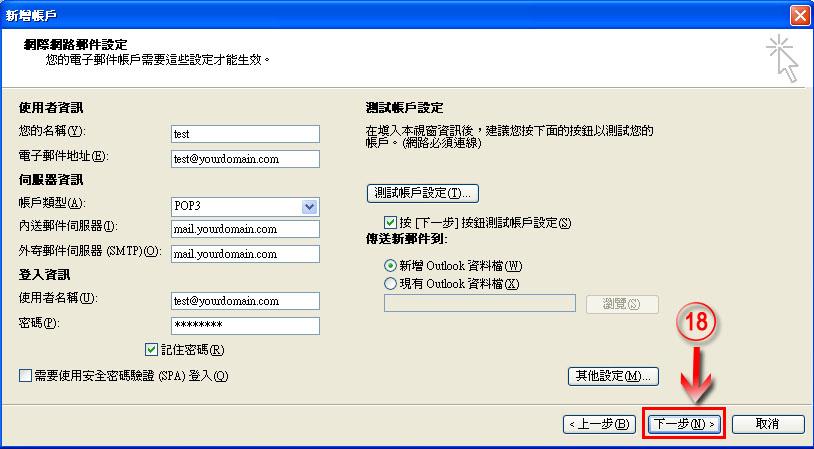
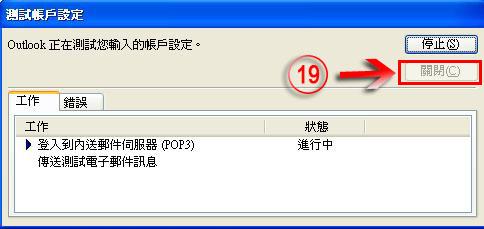
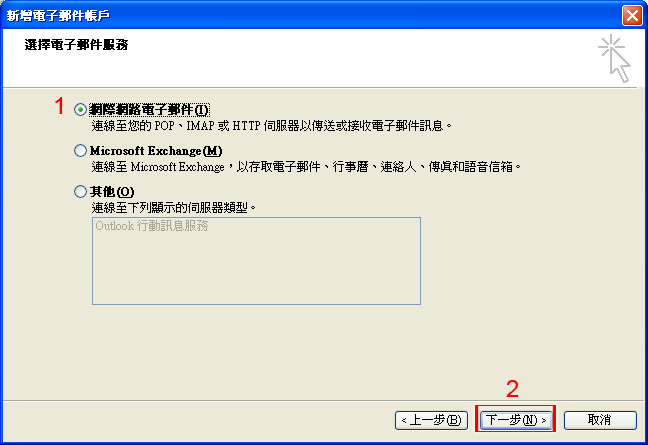
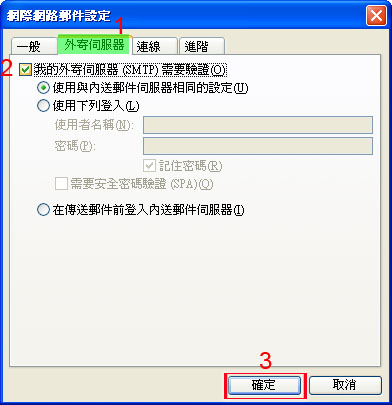
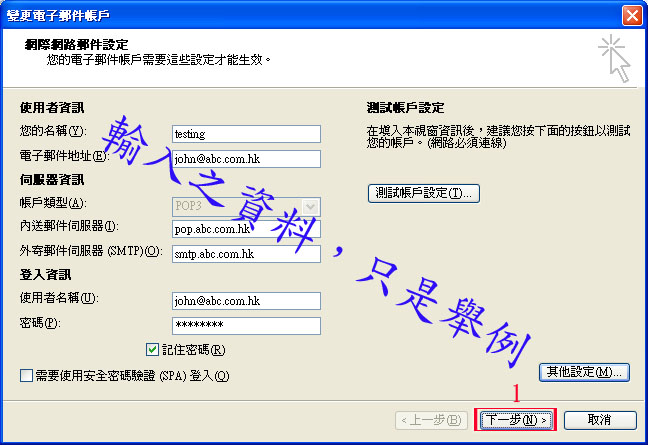
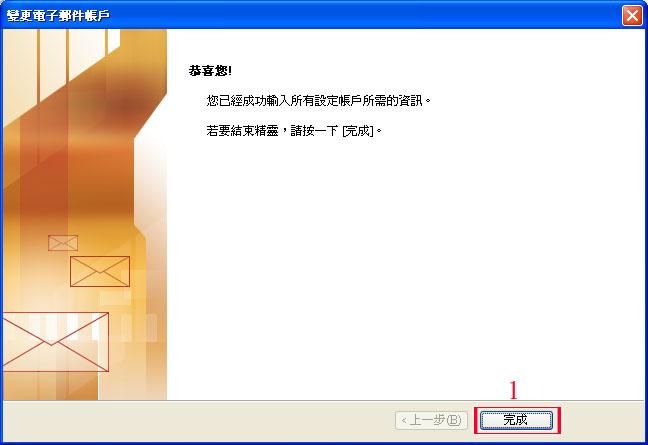
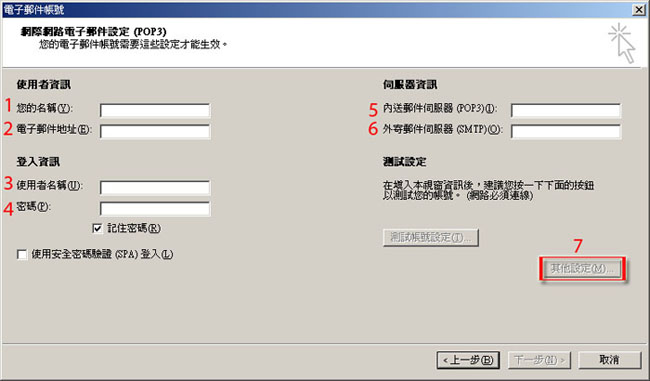
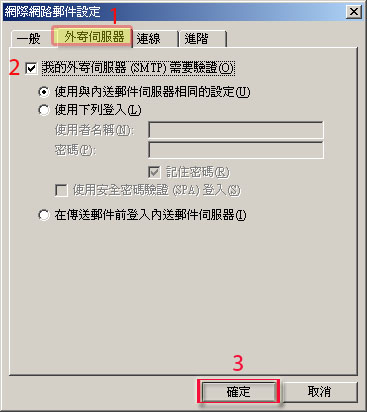
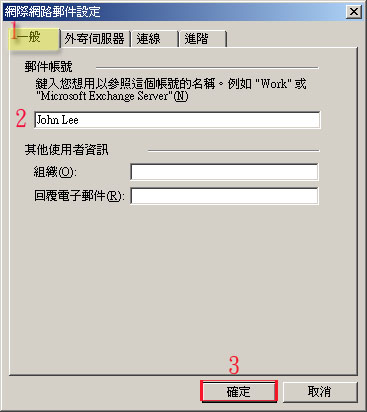
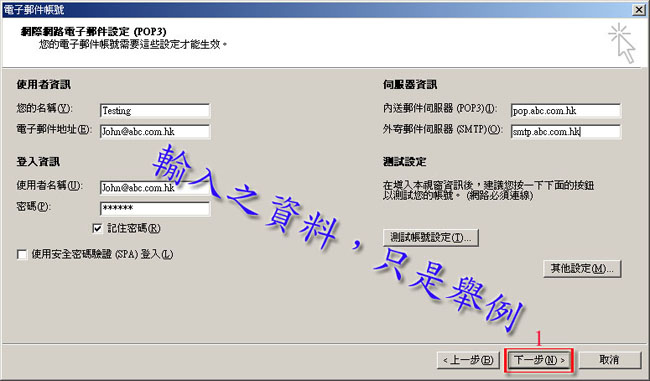
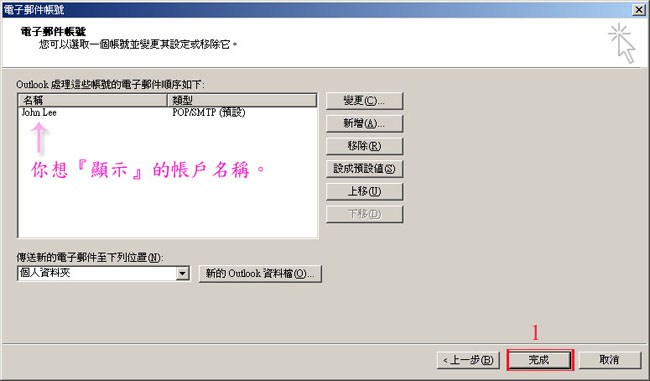
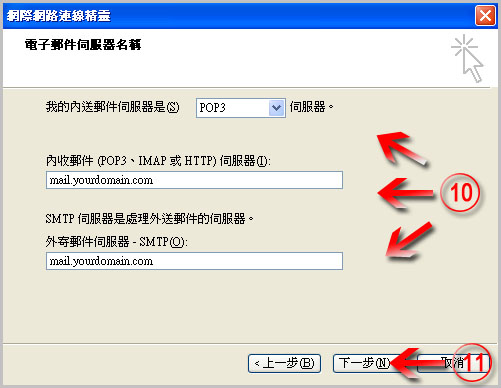
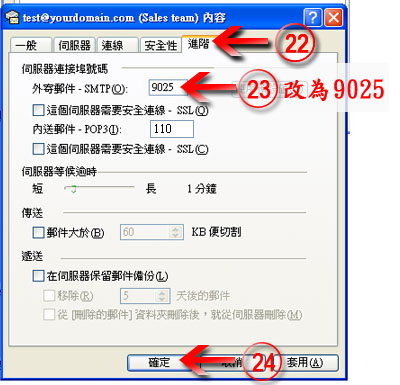
(7) “網際網路電子郵件“ (8) “下一步“ (9 ) 使用者資料 您的名稱: (任意輸入) (10) 伺服器資料 帳戶類型: POP3 (11) 登入資料 使用者名稱: (輸入整個電郵) (11b) (12) “其他設定“ (13 ) 進入 “外寄伺服器” 頁 (14) (15) 進入”進階” 頁 (16) 把 “外寄伺服器” 由 25 修改為 9025. (17) 確定 (18) “下一步“ (19) 最後, 按『關閉』開始使用。
|
|


.jpg)
|
|
|
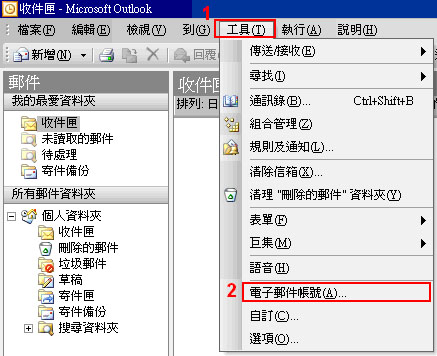
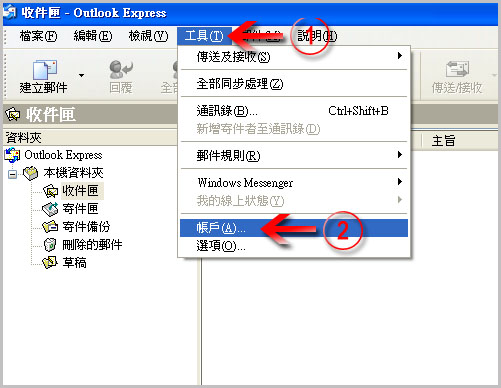
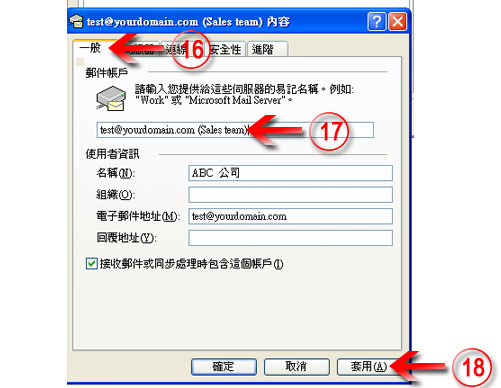
建立電郵帳戶指南
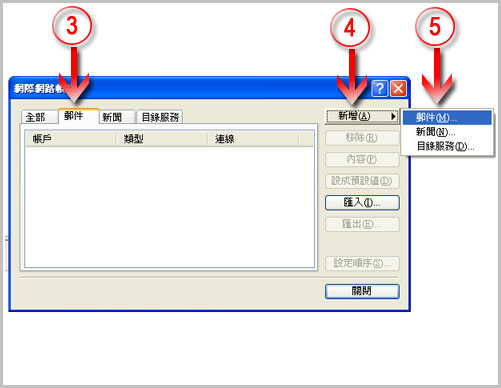
開啟 Outlook Express. Click: (1) “工具“ (2) “帳戶“ (3) “郵件“.
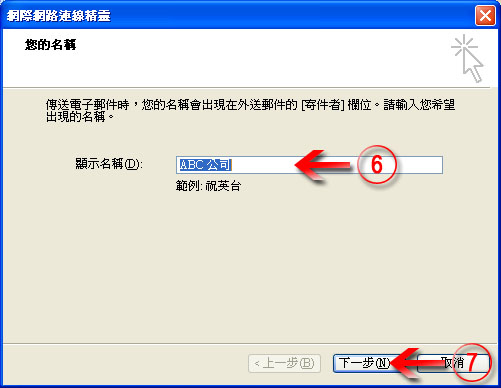
(6) 顯示名稱: (任意輸入)
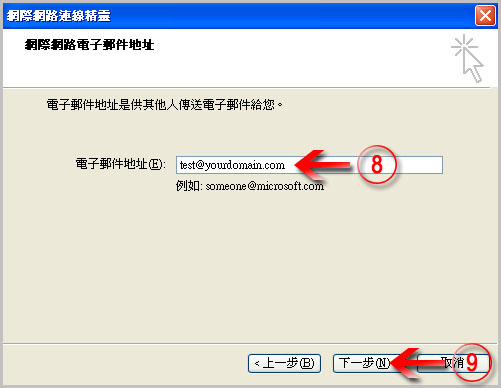
(8) 電子郵件地址: (輸入整個電郵 *
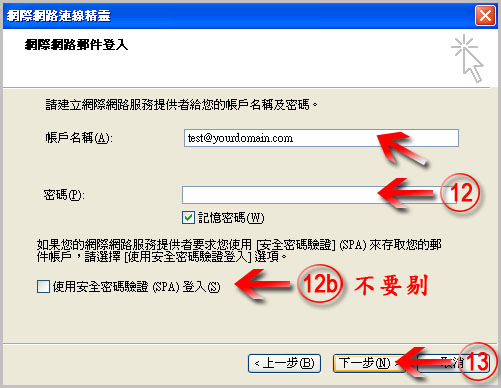
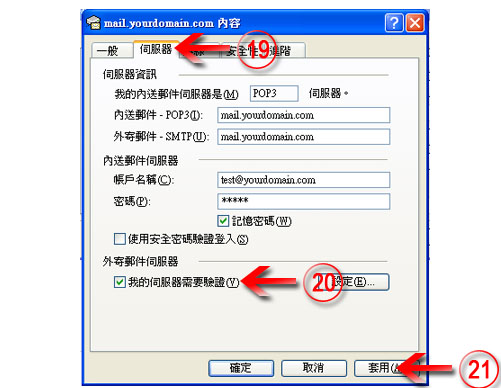
(10) 伺服器資料 伺服器: POP3 (11 ) “下一步“ (12) 登入資料 使用者名稱: (輸入整個電郵)
千萬不要剔!!“使用安全密碼驗證(spa)登入”
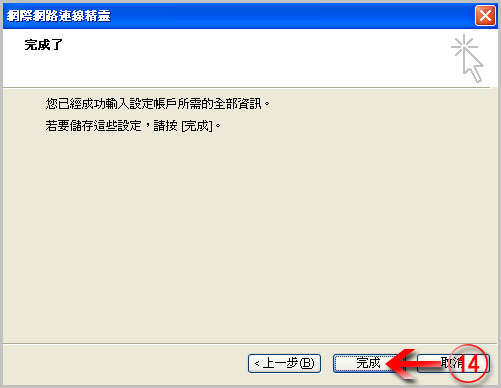
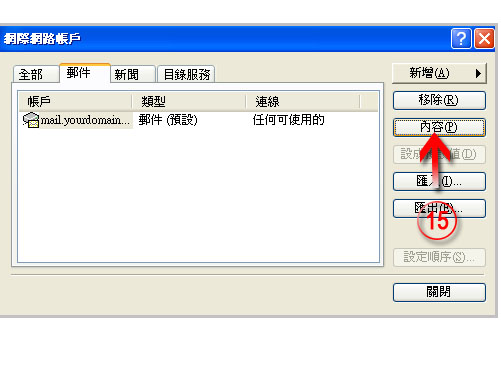
(13 ) “下一步“ (14) “完成” << 未完成, 請繼續步驟(15)-(24) (15) “內容” (16) 進入“一般“頁
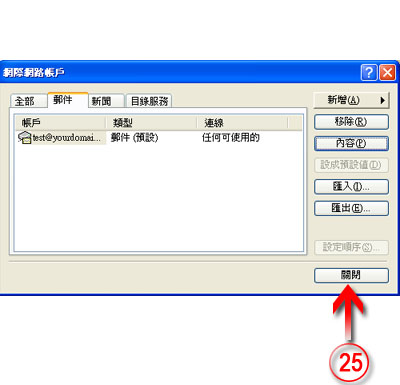
(19 ) 進入 “伺服器” 頁 (22) 進入”進階” 頁 (25) 最後, 按『關閉』開始使用。 |
|
Load More
- For Outlook 2019 + Outlook 2016 + or Outlook 365:
HKEY_CURRENT_USER\Software\Microsoft\Office\16.0\Outlook\Profiles
- Outlook 2013:
HKEY_CURRENT_USER\Software\Microsoft\Office\15.0\Outlook\Profiles
- For Outlook 2010:
HKEY_CURRENT_USER\Software\Microsoft\Windows NT\CurrentVersion\Windows Messaging Subsystem\Profiles
- Start the registry editor. (Type regedit in the Search box.)
- Navigate to the following registry subkey: HKEY_LOCAL_MACHINE\System\CurrentControlSet\Control\Terminal Server\WinStations\RDP-Tcp
- Find PortNumber
- Click Edit > Modify, and then click Decimal.
- Type the new port number, and then click OK.
- Close the registry editor, and restart your computer.
Below is a list of the Common Key Commands to access the factory restore at startup:
ACER– Turn on the computer and hold down ALT. While holding it down tap the F10 key. This will bring up the Acer Erecovery screen. Next choose Restore System to Factory Default.
ASUS– Tap the F9 key at startup. If F9 doesn’t work, turn off the PC, turn it back on, and immediately tap the F8 key and navigate to “Repair Your Computer” to get to the options for the factory restore.
COMPAQ– Compaqs usually use F11 at startup to access the factory restore. If that doesn’t work you can also try F10 or F8 and then select “Repair your Computer”.
DELL– You can access the system restore on most Dell computers by tapping the F8 key when the PC first turns on. This will take you to the “Advanced Boot Options” menu. Use the arrow keys on your keyboard to select “Repair Your Computer”. Next click “Dell Factory Image Restore”.
use F12 to go to Bio.
GATEWAY- Tap F8 and select “Repair Your Computer” to access the options for the factory restore.
HP– Most HP’s use the F11 key at startup to access the factory restore. HP’s calls it the “Recovery Manager”.
IBM- IBM’s almost always use the F11 key at startup to access the recovery partition.
LENOVO– Lenovo PC’s use F11 at start up to access the factory restore.
SAMSUNG– Samsung PC’s usually use F4 at startup. Also try F6 and F8.
TOSHIBA– Toshiba PC’s usually use F8 and then select “Repair Your Computer“. If that doesnt work, turn off the PC, Hold down the “0” key, and while holding it down, turn on the PC